The Matrix Variations: Digital Rain
The Digital Rain effect was made popular in the Matrix movie series. Here we use a variety of features to create the same effect in Excel, along with some interesting variations.
Download
Digital_Rain.xlsmHow it works
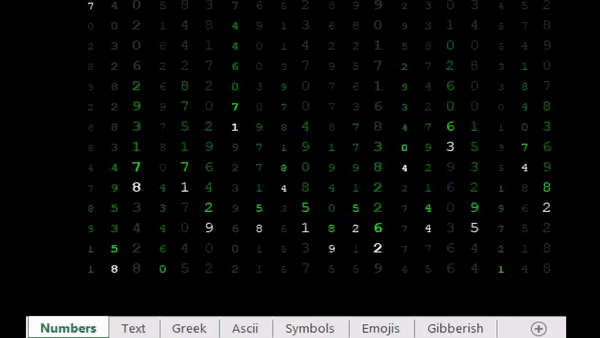
The digital rain effect has the following features:
- Multiple lines of light and dark green text falling vertically.
- Various lines offset from each other.
- White character at the end of the line
- Text changing as it falls.
- Variations on different sheets
While the effect resembles the digital rain effect, it is not a perfect replica of the digital rain seen in the movie series - the length of each line here is fixed and so is the offset between lines.
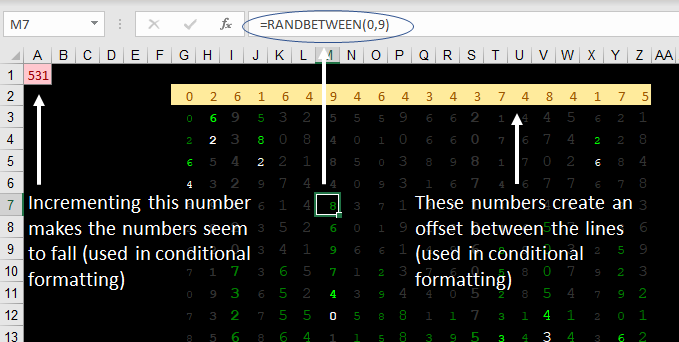
A combination of Excel features is used to create these effects. The RANDBETWEEN function along with the CHAR function is used to generate the changing text. Offset between the lines is created using a set of numbers above the falling text as shown below. The font colour of this set of numbers is set to black to make the numbers invisible.
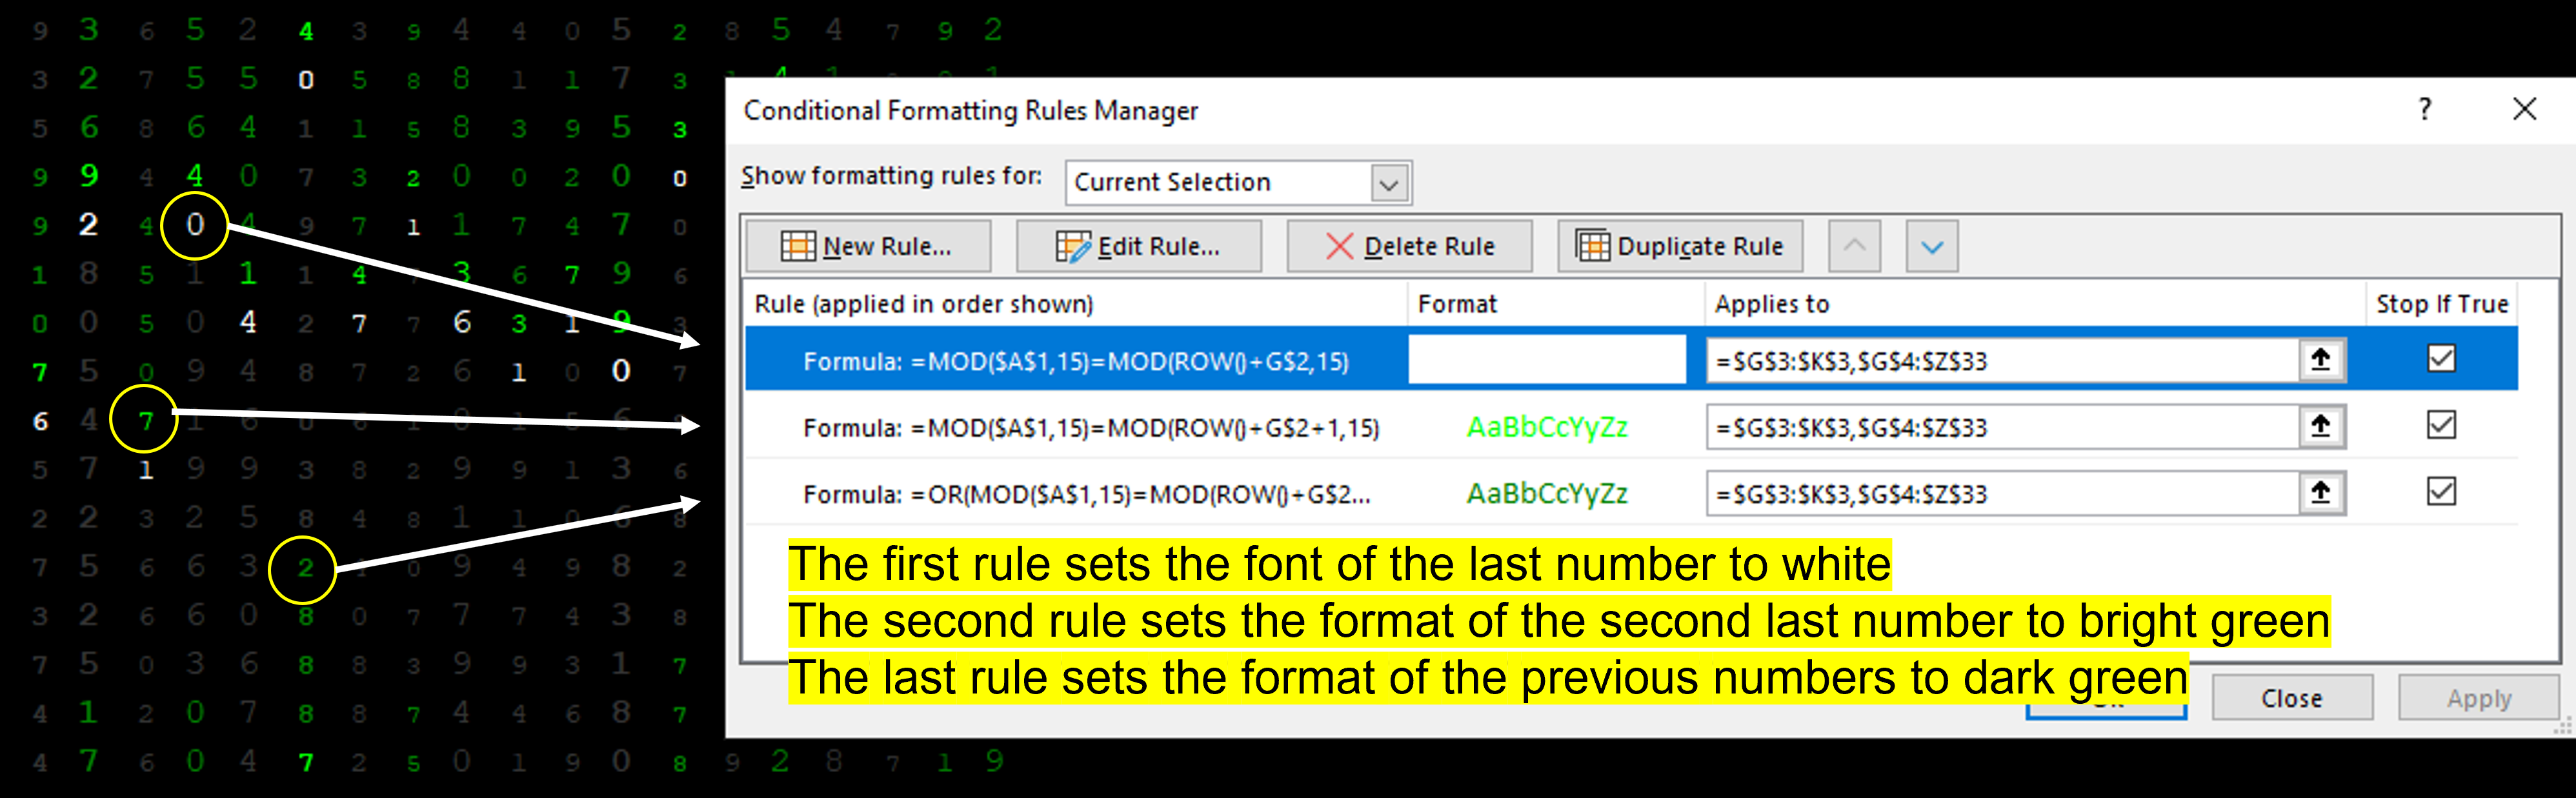
The falling text phenomenon is created by shading all cells black and using conditional formatting to change the font colour depending on it's position. The default font colour is set to grey, this creates a screenburn effect. Three conditional formatting rules are applied as shown below.
The conditional formatting rules use the number in cell A1 and the numbers in the offset row (Row 2). Incrementing the value in cell A1 makes the numbers seem to fall. A simple macro increments this number to create the continuous falling effect. To prevent this number from getting too large, it is reset to 1 once it exceeds 999.
                  Public Declare PtrSafe Sub Sleep Lib "kernel32" (ByVal dwMilliseconds As LongPtr)
                  Public wbopen As Boolean
                  Sub animate()
                      Do While wbopen
                          'Increment A1 till 999 and then reset it to 1
                          Range("A1") = IIf(Range("A1") < 999, Range("A1"), 0) + 1
                          DoEvents
                          'Add a small delay before continuing on
                          Sleep 75
                      Loop
                  End Sub
This macro is triggerred when the workbooks is opened. The animate macro runs in a loop till the workbook is closed.
                  Private Sub Workbook_BeforeClose(Cancel As Boolean)
                    wbopen = False 'Stop macro
                  End Sub

                  Private Sub Workbook_Open()
                    wbopen = True
                    animate 'Start macro
                  End Sub
Finally, the variations in different sheets are created by using the CHAR function together with the RANDBETWEEN function. The CHAR function returs the character associated with a specific number. By using different sections from the characnter table, we can get the function to returns different characnters such as Ascii and Greek. For example, the formuka =CHAR(RANDBETWEEN(97,127)) returns a Greek characnter. To get emoji characnters, we use the UNICHAR function which is an extension of the CHAR function. The use of function makes the anomation a lot slower on the Emoji page. The Symbols are generated simply by using the Wingdings font.